


Follow Our Step-by-Step instructions to Install SSL Certificate on Microsoft IIS 8 and 8.5
The IIS (Internet Information Services) web server powers around 20% of the websites on the internet. If you come across the word ‘server’ at least ten times a day, you’d know that SSL has become a web-standard in 2017. More than half of the internet is already encrypted and this migration from HTTP to HTTPS is not going to stop anytime soon.
If you’ve ever dealt with SSL certificates, you’re well aware of the fact that it can get messy. And if you haven’t, good for you! In either case, you must have a proper guide by your side while installing an SSL certificate on IIS or any other server for that matter. This step-by-step guide will help you install the SSL certificate on Microsoft IIS 8 and 8.5.
So, what are you waiting for? Let’s get to business.
Wait, make sure you have the following things before you begin.
- Server Certificate
- Intermediate Certificate
- Private Key
Have all of ‘em? You’re good to go.
Installing SSL on Microsoft IIS 8 & 8.5 – Single Certificate
- You should have received an E-mail from your certificate issuing authority containing your certificate in a zip file. Save the file named ‘your_domain_name.cer’ to the desktop.
- Open IIS manager by searching for it in the Start menu.
- Select the server on which you want to install an SSL certificate.
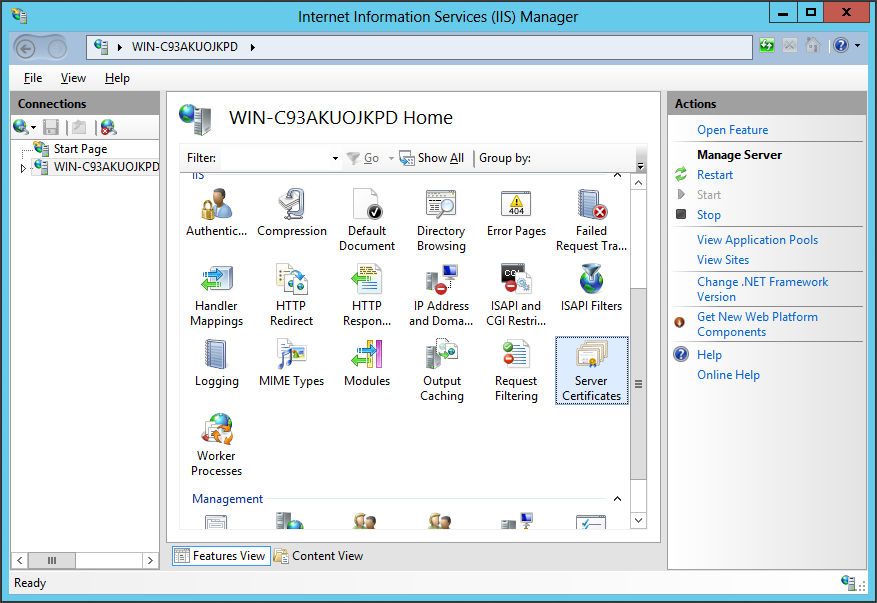
- As shown in the below image, find the Server Certificates button at the bottom of the center menu and double-click it.
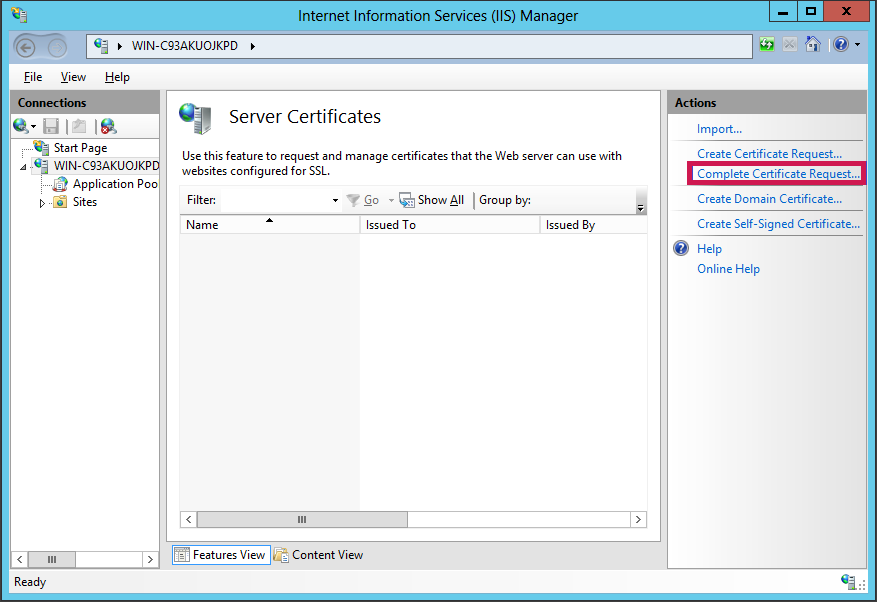
- See the Actions menu on the right? Click on Complete Certificate Request… You should now be seeing the Complete Certificate Request wizard.
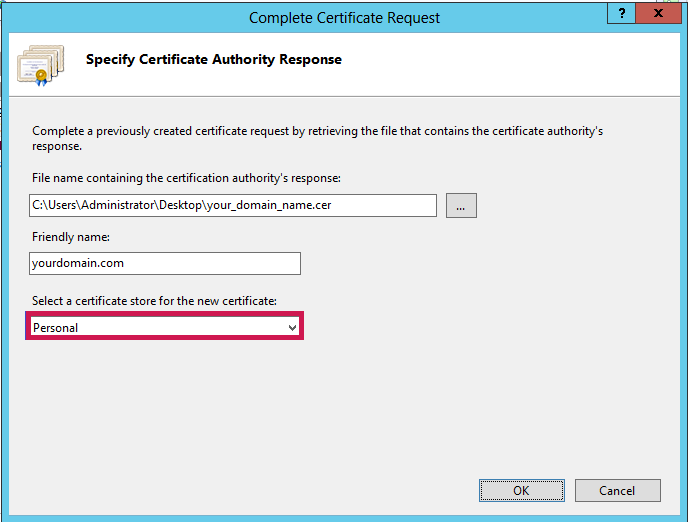
- Browse and select the your_domain_name.cer file, enter its friendly name and select Personal in the certificate store as shown in the below image.
Note: If you want to install multiple SSL certificates on IIS, choose the option Web Hosting instead of Personal.
- Click OK. The certificate installation will start now.
- Now that you’ve taken care of SSL on your server, the next part is assigning the certificate to the website.
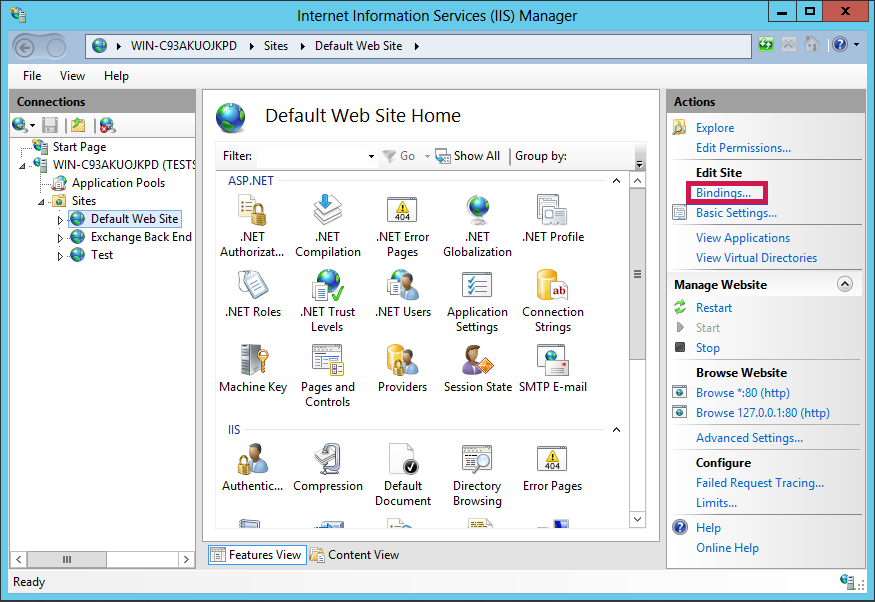
To do so, you must go back to the main frame of the IIS Manager. From the connection panel on the left-hand side, select the name of the server on which you just installed an SSL certificate.
- An option named Sites will be listed under the server name. Select the site that you want to encrypt.
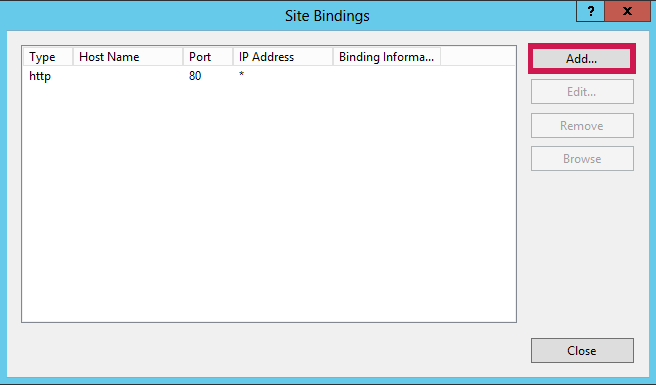
- On the Actions menu, click on Bindings. A window named ‘Site Binding’ will appear on your screen.
- Click on Add.
- In the Add Site Binding window, all the values should be as following:
- Type: https
- IP Address: All Unassigned
- Port: 443
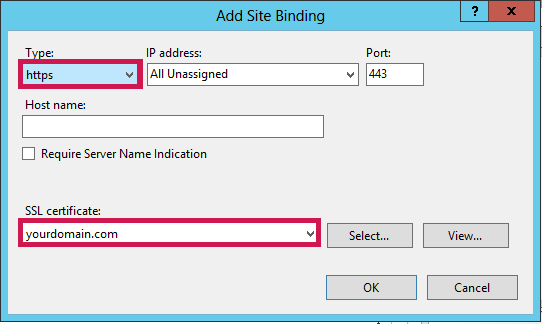
Select the domain on which you want to install SSL and click OK.
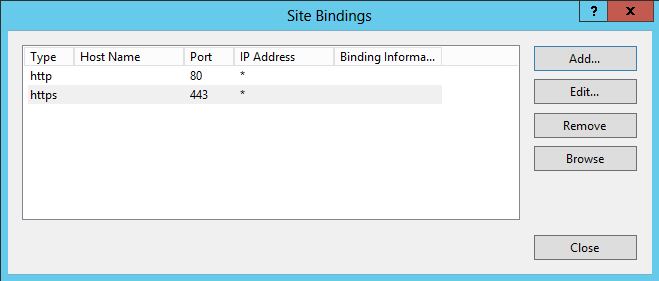
Congratulations!!! Your SSL certificate is now deployed on your website. Yes, really. You did it! Pat your own back or high-five yourself if you want to.
If you want to check the installation thoroughly, check it for free using our super-quick SSL Checker tool.