


 (3 votes, average: 3.67 out of 5, rated)
Process to Generate CSR and Install SSL Certificate on FileZilla Server
Before you start the Installation process, please mark the following points
- Buy/Renew SSL certificate from a Trusted SSL Certificate Authority (CA).
- Save the SSL Certificate files provided by the CA into a specific location.

How to Generate a CSR on FileZilla Server
- Sign in to your FileZilla Server via the SSH (Secure Shell) terminal
- Now execute the following line of code
openssl req –new –newkey rsa:2048 –nodes –keyout server.key –out server.csr
- This code begins generation of the CSR and Private Key File.
- The system prompts you to add the common name, this is where you add your domain name.
- When the system prompts you to add the organization information along with the location, add the full address or location of your business.
- The Private Key and CSR are now generated and named: server.key and server.csr.
- Change their name and Save them into a specific location; change the name todomain.key and domain.csr file name.
FileZilla Server SSL Certificate Installation Process
- Log in to your FileZilla Server.
- Now, click Edit > Settings
- The FileZilla Server Options window will appear
- Click SSL/TLS certificate in the bottom left corner.
- Mark FTP over SSL/TLS support (FTPS).
- Now find and select the Private Key file and SSL Certificate file.
- Mark Allow explicit FTP over TLS and Disallow plain unencrypted FTP
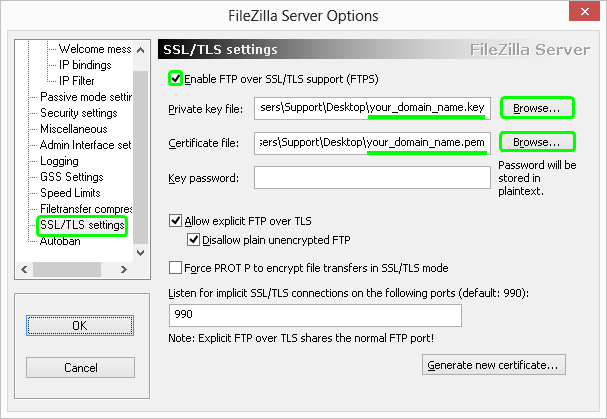
- Click on OK
- Your SSL Certificate is now installed on your FileZilla Server.